PaySec Advanced Gateway - Transaction Processing
Overview:
The Process Transaction tab allows you to process credit card or ACH (check) transactions by entering a customer’s payment information.
- Terminal (EMV) transactions are also supported.
The virtual terminal enables you to take additional actions related to transactions, such as setting up recurring payments, adding a surcharge, configuring sales tax, saving or updating a customer profile, and more.
Processing a Credit Card transaction:
- Navigate to the Process Transaction tab on the left panel.
- For new customers, enter the customer’s name, the name on card, and the card details.
- For existing customers, begin typing the customer’s name or customer number to receive system matches and make a selection.
- Enter the amount.
- Navigate to the bottom right corner of the page and click Process Transaction.
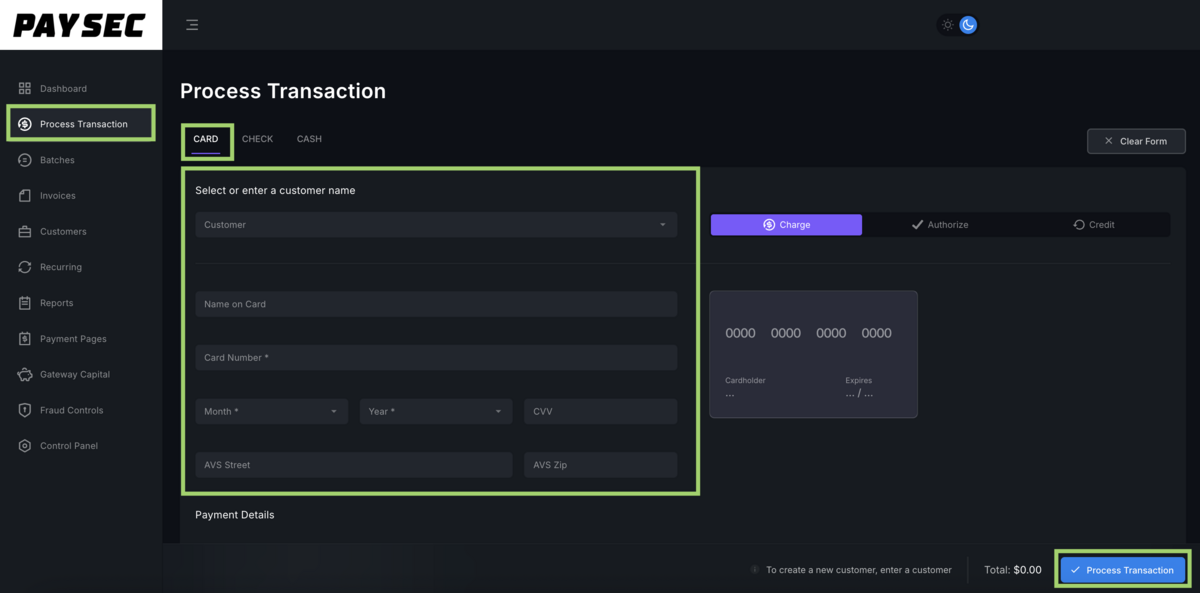
TIP! For a customer with more than one stored payment record, click the down arrow to the right of the Card Number field to choose between different cards.
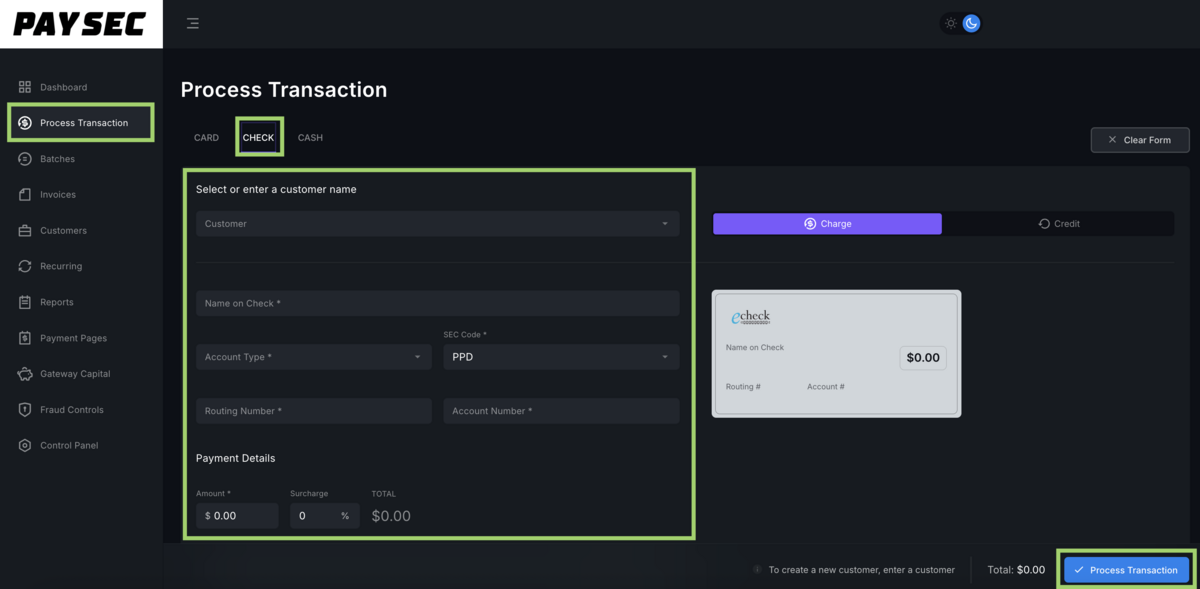
Processing an ACH/Check transaction:
- Click on the Check tab at the top of the Process Transaction page.
- For new customers, enter the customer’s name, the name on the check, and check details.
- For existing customers, start typing the customer’s name or customer number to receive system matches.
- Enter the amount.
- Click Process Transaction at the bottom right corner of the page.
Additional transaction data:
- Transaction details, such as the Invoice Number, PO Number, and Description, can be added by clicking on the Transaction Details banner.

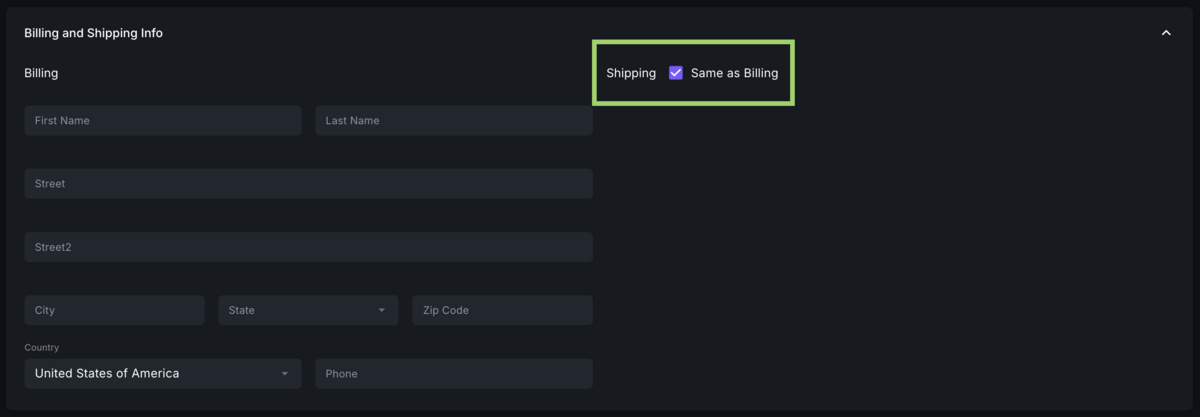
- Enter billing and shipping information by clicking on the Billing and Shipping Info banner.
- Shipping Info list same as billing by default. To enter separate values, uncheck the same as billing box.
- To create additional discretionary data fields, go to the Control Panel tab on the left panel, click on Custom Fields, and add up to 20 custom data fields with labels.
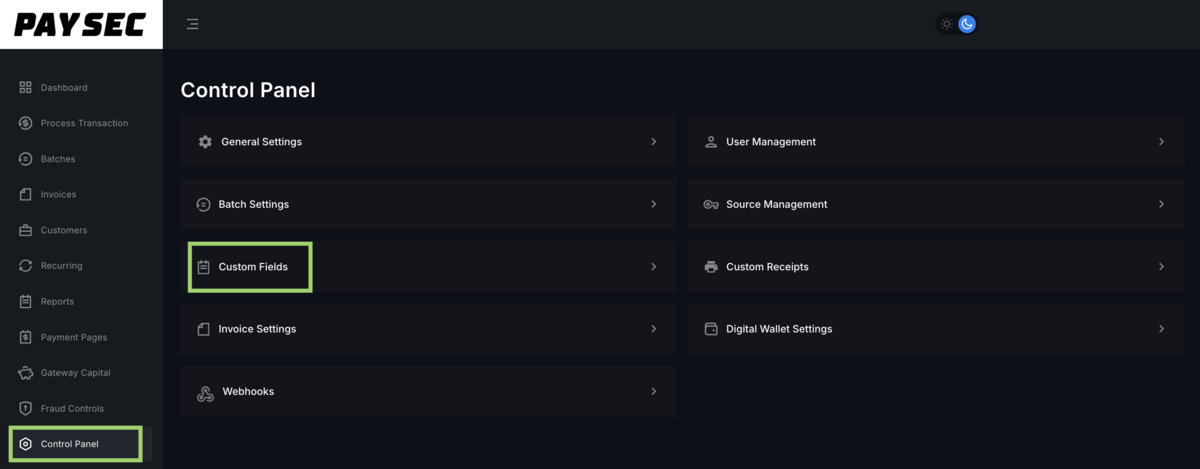
- Click the star until it turns purple to mark the field as required.
- Save
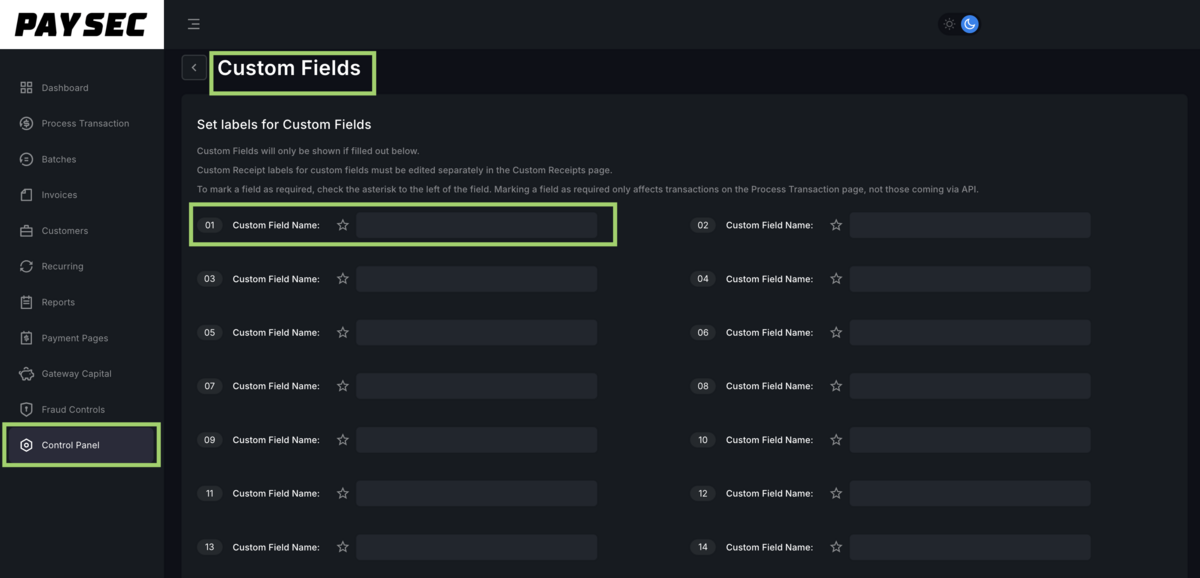
TIP! Custom fields can be added to Hosted Payment Pages and receipts and are visible within reporting.
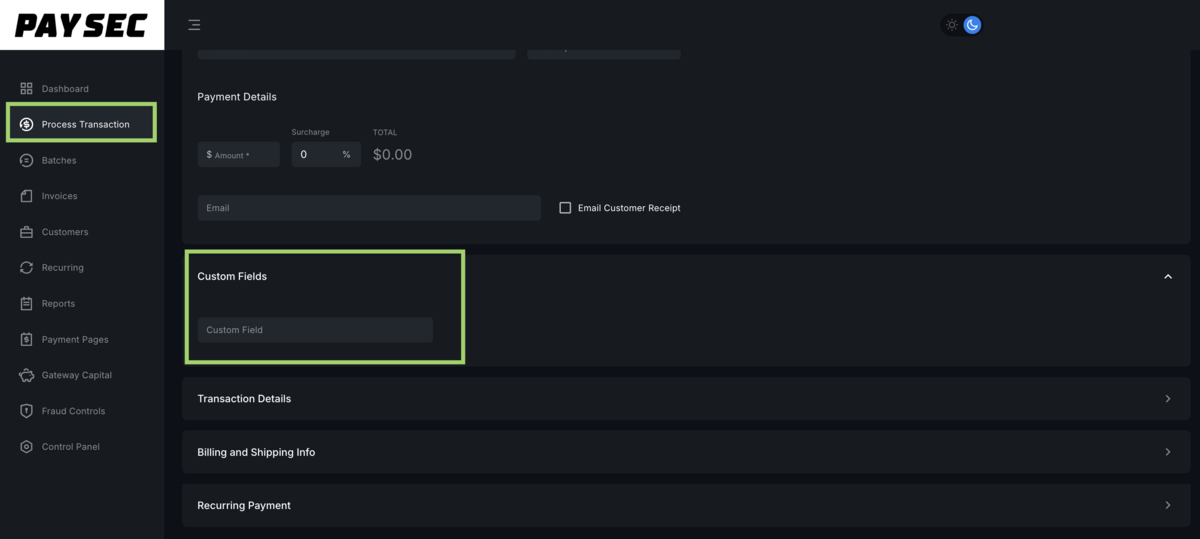
- These fields will now appear under the Custom Fields banner in the Process Transaction tab.
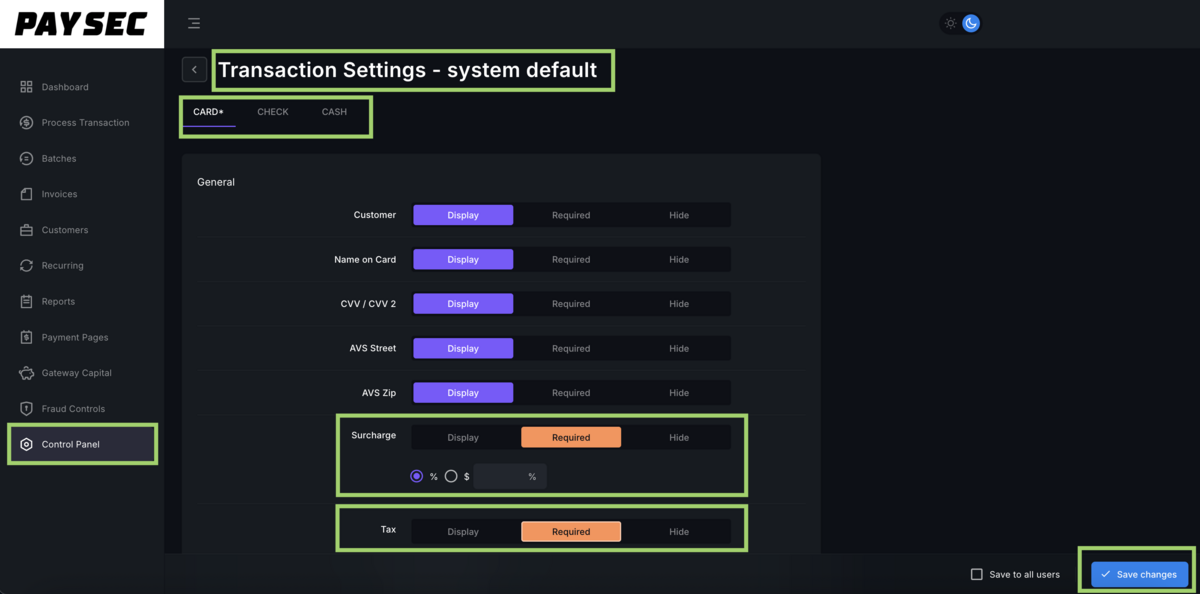
TIP! Navigate to Control Panel > User Management > Transaction Settings to customize the fields in the Process Transaction tab.
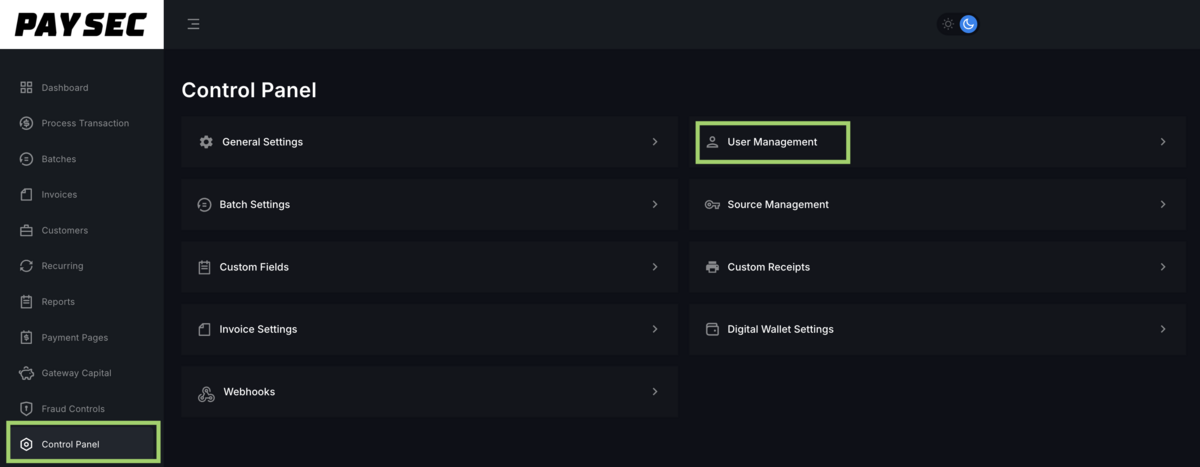
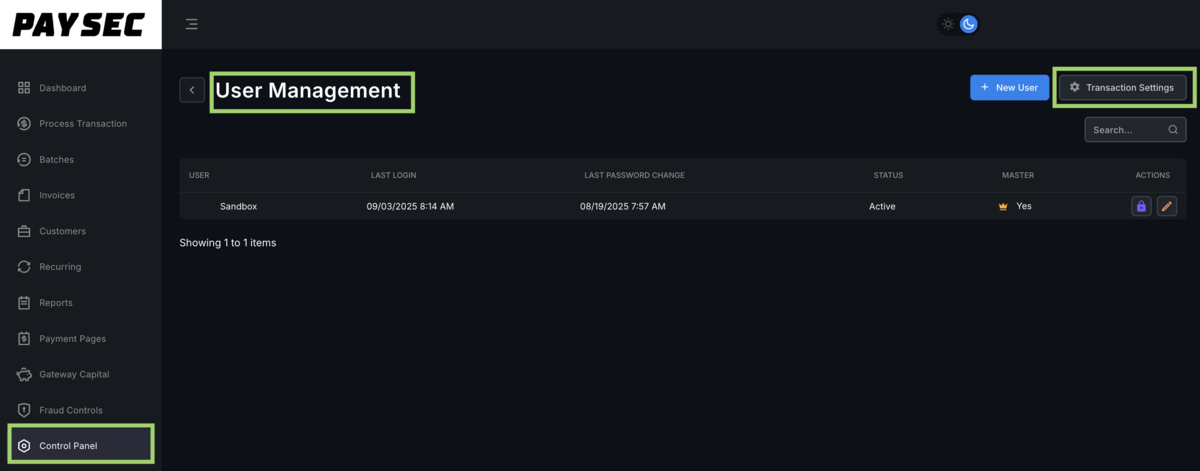
Here, you can choose to display, require, or hide specific fields. Default settings for surcharge and tax can also be set. These settings can be configured separately for card, check, and terminal and can also be configured at user level.