PaySec Advanced Gateway - Invoicing
Overview:
The Invoicing tool allows you to send an email or text message directly from the virtual terminal to your customer. The email can include a PDF attachment with the invoice details you entered, along with any additional attachments you choose. Both the email and text message will contain a secure link to a payment form.
- The payment form will display the invoice along with payment fields, allowing the customer to enter credit card, ACH (if enabled), or digital wallet details. They can also electronically sign and pay the invoice.
As part of the invoicing tool, the Products tab lets you store products or services with preset descriptions, prices, and other details, making it easier to add items to your invoices.
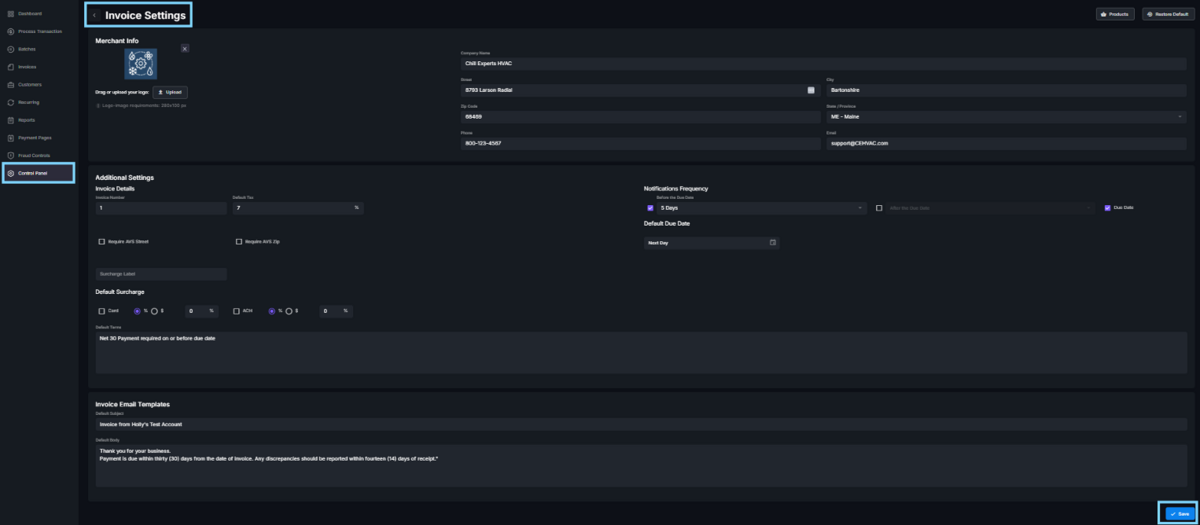
Designing your invoice:
- Before creating an invoice, navigate to the Control Panel tab on the left panel.
- Click on Invoice Settings.
- Upload your company logo.
- Adjust how the company name, address, and contact information will be displayed on the customer’s invoice.
- You can also set several defaults and configurations for your invoices, including:
- Default Due Date and payment terms.
- Invoice Number, which allows invoices to auto-increment from the set number.
- Custom notifications, your customers will be notified via email prior to, on, and/or after the due date.
- Set tax amount.
- Set a default surcharge (along with a surcharge label) to be applied to each invoice.
- Set subject and content of emailed invoices.
- Mandate AVS Street and/or Zip for customer entry.
- Click Save Changes.
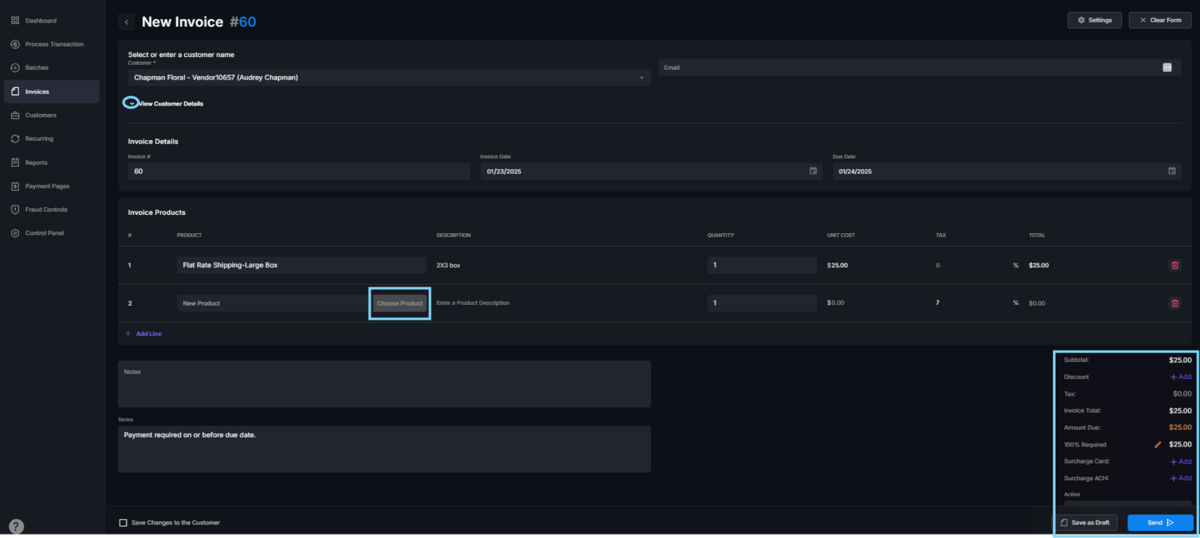
Creating and sending an invoice:
- Invoices allows you to send an email or text message to a customer containing a secure link to a payment form where they can view and pay the invoice.
- To create an invoice, navigate to the Invoices tab on the left panel.
- Click on the New Invoice button in the top right corner of the page.

- Enter the customer details and any additional information you wish to include.
- Enter line items:
- Add an existing product or manually enter new product details (unit cost is mandatory).
- You can apply a tax, surcharge or discount.
- You can adjust the required amount (allowing the customer to pay in two installments).
Click Send at the bottom of the page to send the invoice immediately or click Save to save it as a draft and send it later.
- Once you click Send, a window will pop up, allowing you to enter additional email addresses and/or cell phone numbers, customize the subject line and content, and attach files/system generated PDF to be sent by email with the invoice.
- Click Send Invoice at the bottom of the pop-up window.
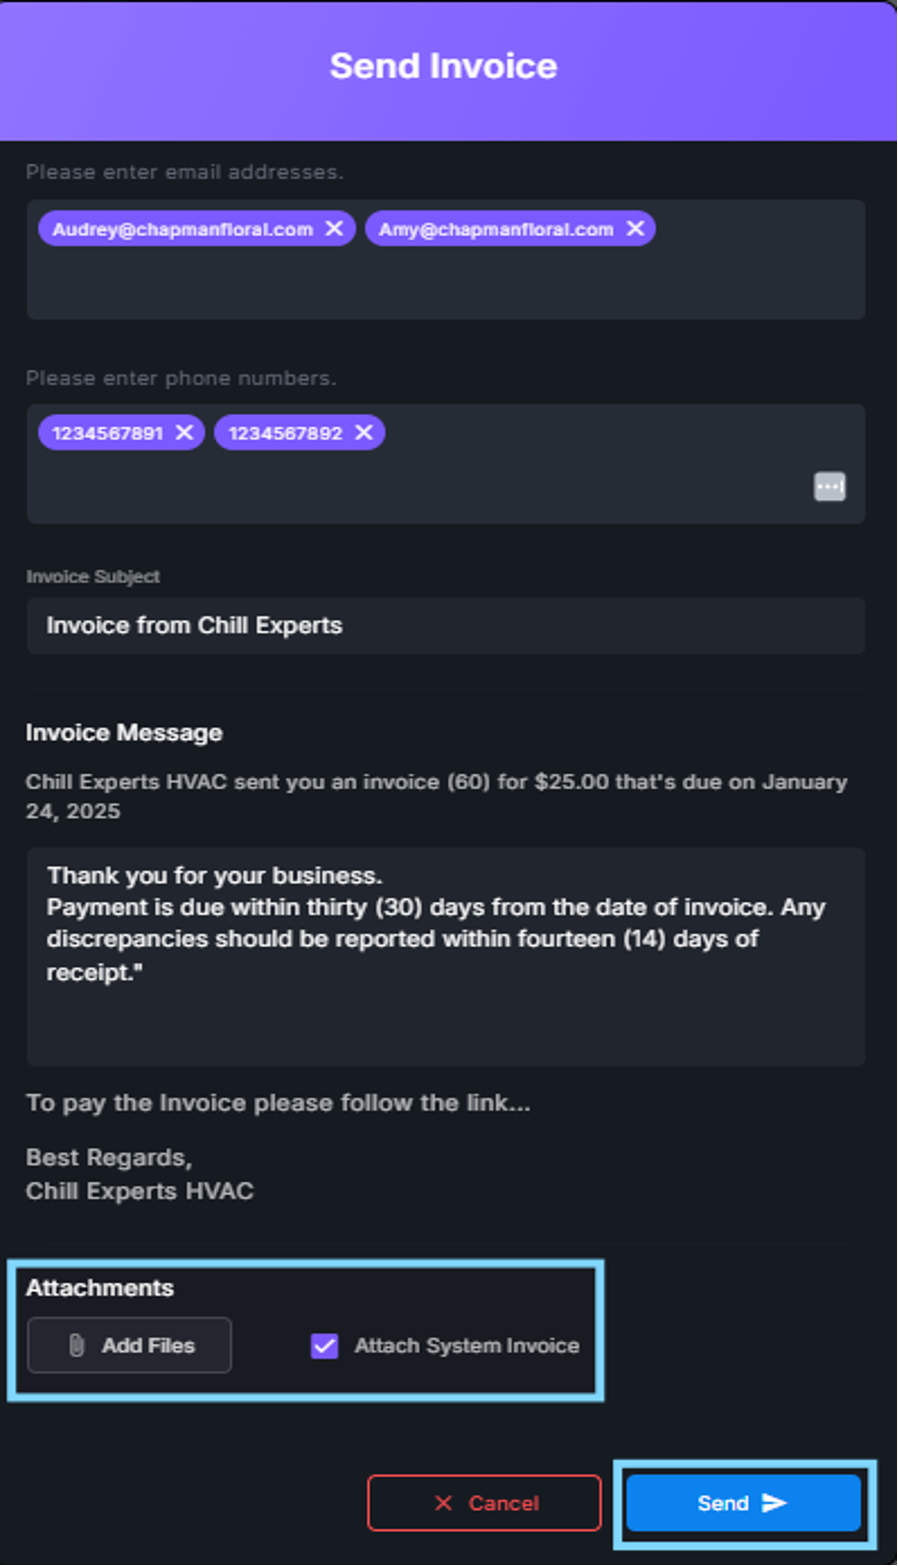
TIP! If you add an additional email address or cell phone number, press tab after typing it to save the address/number.
By default, every emailed invoice includes a PDF file attachment of the invoice unless you uncheck the “Attach System PDF” checkbox. The Add File button allows you to attach additional files.
Post invoice actions:
- There are several options available once an invoice is sent.
- In the Invoices tab on the left panel, you’ll find a listing of all invoices.
- On the right side of each invoice (under Actions), up to five action options will appear.
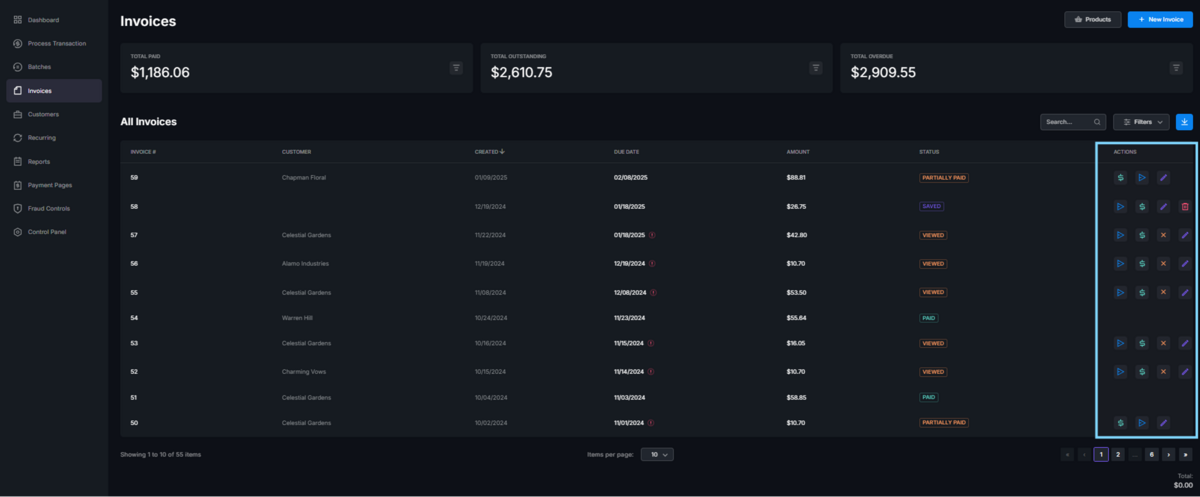
- You can Resend an invoice, this will resend the invoice to the customer via email or text message.
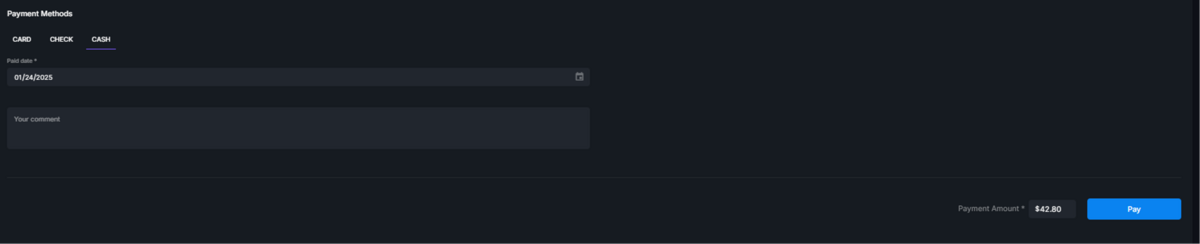
- Clicking on the Pay icon will allow you to either pay on behalf of the customer using stored or new payment methods or mark the invoice as paid without running a transaction (e.g., paid by cash).
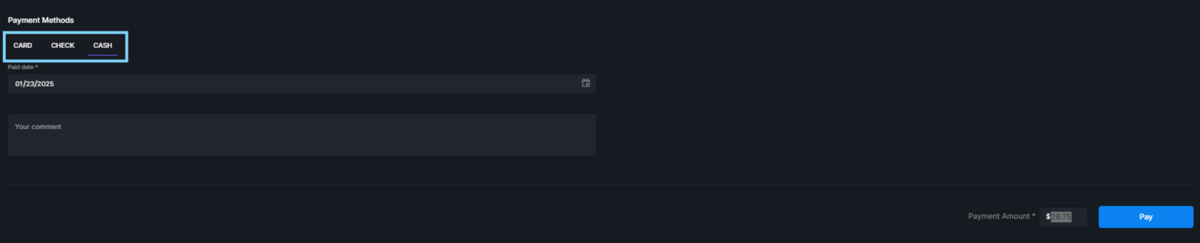
- If you choose the Cash option, you can enter a partial amount and mark the invoice as partially paid.
- The Cancel icon disables the link in the emailed invoice sent to the customer, effectively canceling the invoice.
- The Delete icon deletes the invoice entirely (automatically disabling the link as well).
- The Edit Invoice icon allows you to make changes to an existing open invoice.
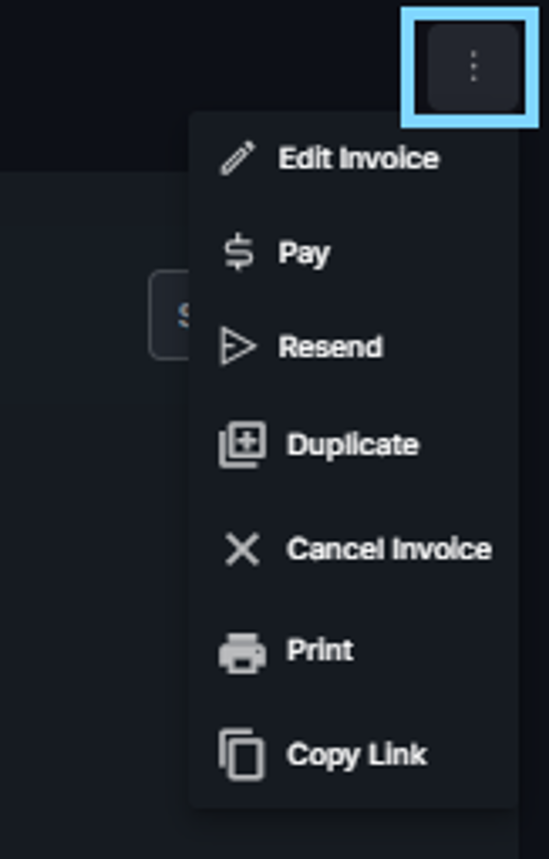
Additional options can be accessed by clicking the invoice you wish to select. In the upper-right corner, you can choose from the following menu options: Edit Invoice, Pay, Resend, Duplicate, Cancel Invoice, Print, or Copy Link.
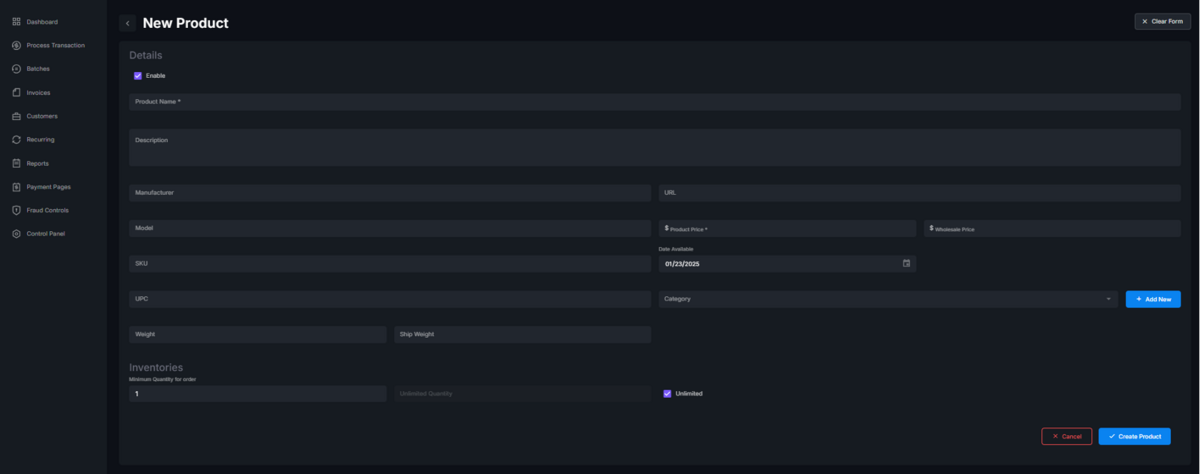
Products and Inventory:
- You can create and store products for easy recall and addition to an invoice.
- Navigate to the Invoices tab on your left panel.
- Click on the Products button at the top-right corner of the page.
- You can create categories and sub-categories before adding products by selecting the associated tabs, or you can do this from within the + New Product tab.
- Enter as many details as you wish for the product (Product Name and Amount are mandatory).
- Click Create Product at the bottom of the page.