PaySec Advanced Gateway - Customers
Overview:
The Customers tab is where all your customer information, including payment methods, is securely stored. Creating and storing customer profiles allows you to easily select existing customers when processing transactions, creating invoices, etc., so that all relevant details are pre-filled.
It also provides an easy way to view and manage the transaction history and additional details for each specific customer.
Storing Customer Information:
- The Customers tab on the left panel is where your customers and their information, including payment methods, are securely stored.
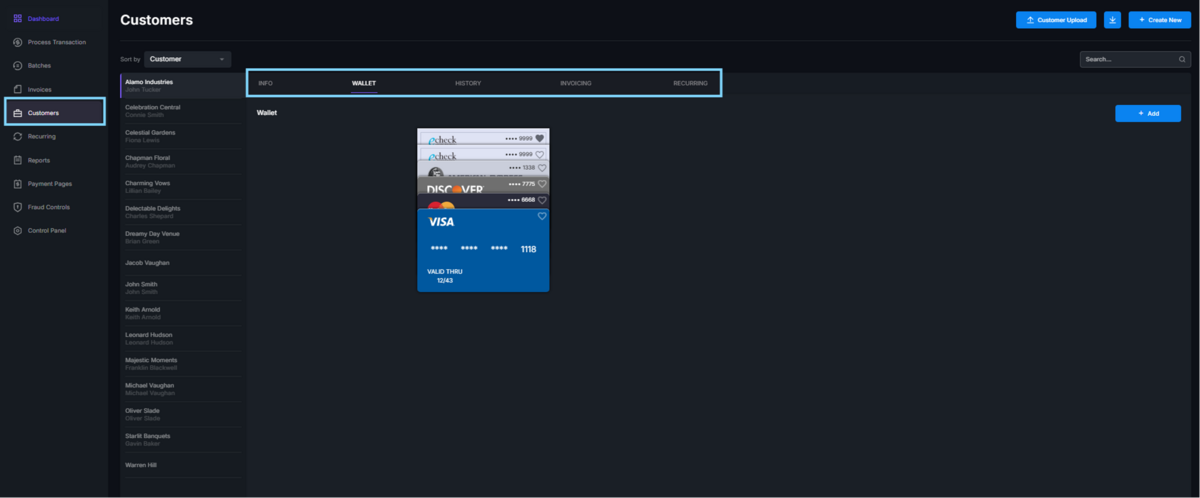
- For each stored customer, there are 5 tabs: Info, Wallet, History, Invoicing, and Recurring.
- Info stores general contact, shipping, and billing information.
- Wallet securely stores the customer’s payment methods.
- Once a credit card or ACH is entered/saved, only the last four digits are visible.
- To mark a payment method as the default, click the heart icon on the specific card.
- History records the transaction history of this customer.
- Invoicing tracks all invoices sent to this customer.
- Recurring records all recurring schedules associated with this customer.
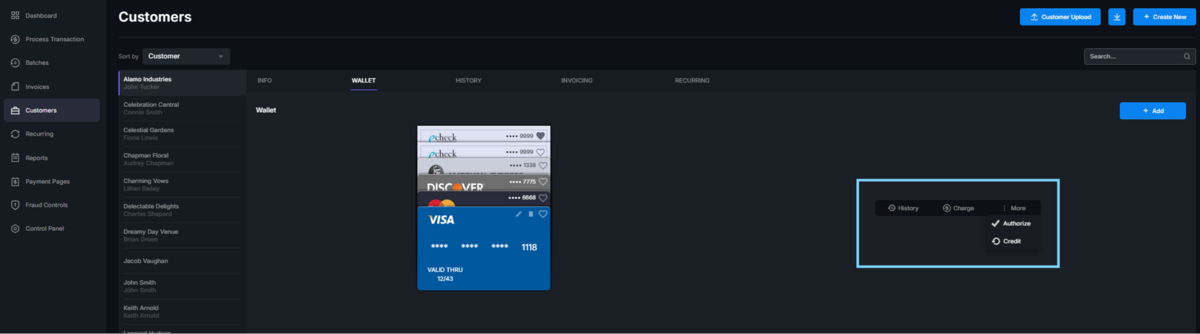
TIP! Under the Wallet tab, you can view the transaction history for a specific card or ACH by clicking on the payment method and then selecting the History button. Transactions can also be processed from the wallet by selecting the card and clicking Charge or, if enabled, Authorize/Credit.
Creating a new customer
When processing a transaction:
- Enter the customer’s name, the name on the card, and the card details.
- Check the Create a new customer checkbox at the bottom of the page.

- Click Process Transaction.
- The transaction will be processed, and the customer profile will be automatically saved in the Customer vault.
Without Processing a Transaction:
- Navigate to the Customers tab in the left panel.
- Click on the Create New button in the upper right corner.
- Enter the customer details.
- Click Save.

- Next, locate the customer you just created.
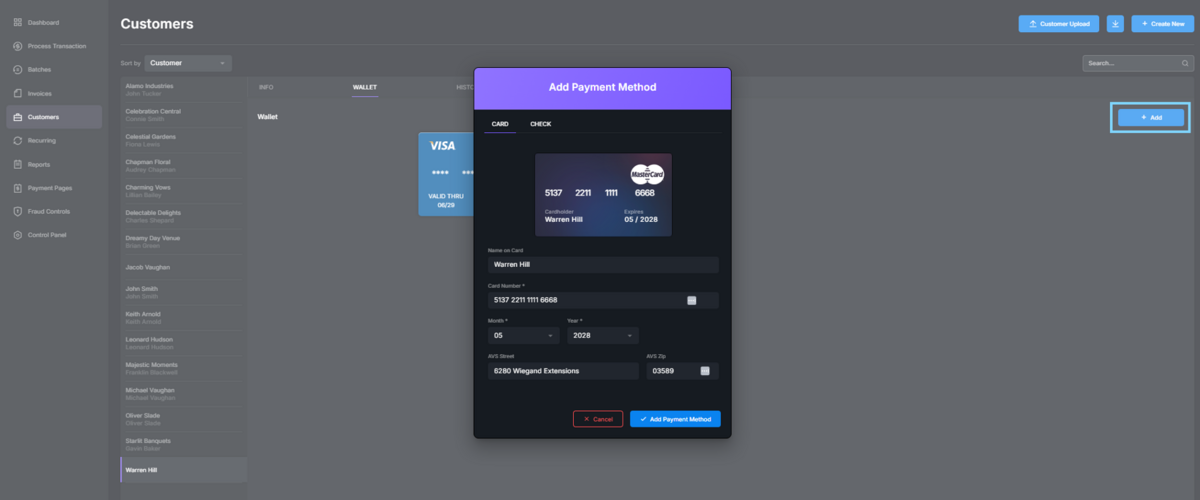
- Click on the Wallet tab.
- Click on the Add button on the far-right side of the page.
- Fill in the credit card or check details.
- Click Add Payment Method.
TIP! An option to merge records can be found on the customer’s info tab. This will bring up a list of customers for you to select which records to combine.
Once a customer is saved, their details will automatically populate all customer and transaction fields as you begin typing the customer’s name.
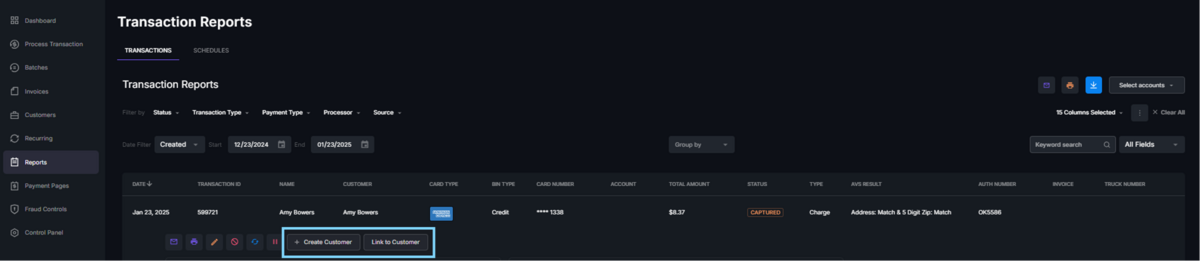
Creating a customer post-transaction:
- If a transaction was processed without saving the customer profile (e.g., the Create a new customer checkbox was not checked, or the transaction was processed outside of the virtual terminal), you can create a customer profile from the transaction.
- Click the transaction processed for this customer in the Reports tab on the left panel.
- Select the Create Customer button.
- Link to Customer allows you to associate the information with an existing customer.
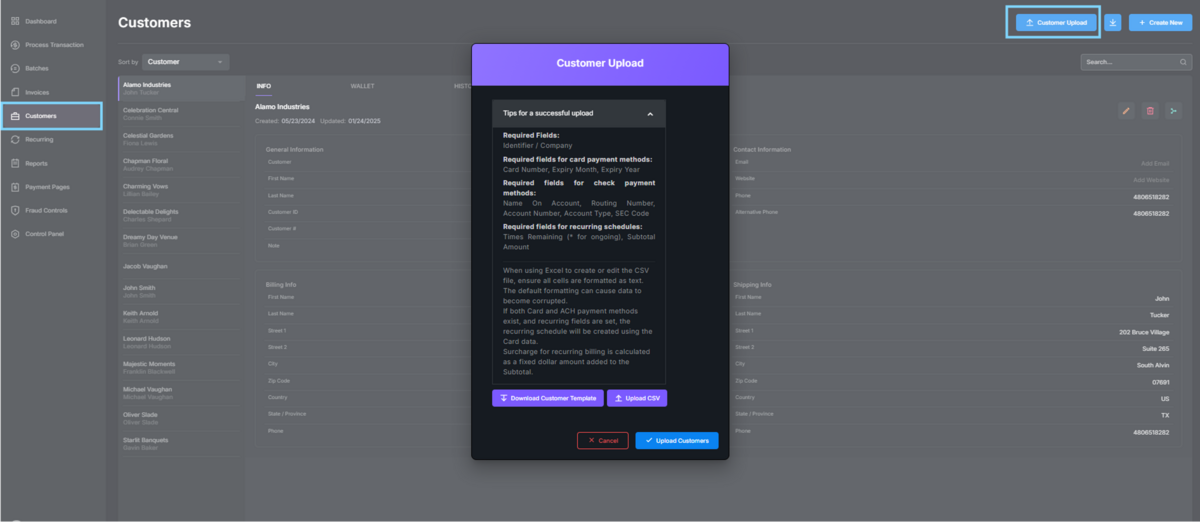
Customer Upload:
- Customer Upload allows you to upload a CSV file to the gateway with multiple customer profiles, rather than manually creating each one separately.
- To upload a customer file, navigate to the Customers tab on the left panel, and click on the Customer Upload button in the top right corner of the page.
- A pop-up will give you the option to Download the customer template with the required header: Identifier / Company.
- Fields can be left blank unless otherwise specified in the requirements.
TIP! When using Excel to create or edit the CSV file, ensure all cells are formatted as text. Default formatting can cause data to become corrupted.